Welcome to another feature to my Blog Buddy Series. Blog Buddy is the place to go for helpful tips for starting and adding things to your blog. I am definitely NOT an expert in blogging, but have learned a lot along the way by trial and error...mostly error, lol !!! Thought I would share what I've learned with you. You can click the Blog Buddy Button on the right side bar for more tips or click HERE.
Today's feature is adding Pages to the top of your blog. Pages are stand alone posts that you can feature certain things. You can add...
- an about me page
- contact info
- family info
- what your blog is about
- sewing tutorials
- cooking
- advertising
- so many other ideas too!!
Page features...
- Pages are permanent, static and are always there, unlike a blog post that is incorporated within in your blog and are found by the date of the post...in chronological order.
- you may want to have a page about something important, so visitors won't have to search your blog for that post
- you are allowed 10 Pages, not including the "Home" button which just brings you back to the most current blog post. The "Home" button just appears when you start the pages
- you can write them just like a blog post
- edit and change them as much as you'd like
If you haven't noticed Pages before...here's what my Pages look like under my Title. Little red tabs of specific info.
Let's get started...click on all pictures to enlarge to see them better.
- first, if you have a blog template that already has pages, you will just click on "NEW POST" on your dashboard.
If you don't have Pages already, you can add them in the design section, click add gadget, then click "ADD PAGES"
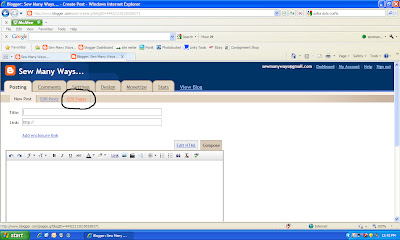
Now we are all starting at the same point now...under the New Post section, you will click the third one over that says..."EDIT PAGES"
Then click the "NEW PAGE" button...I had all my 10 pages, so I deleted one just to show you the New Page Button. See each page I have set up? Each one is written separately. You can edit each one and delete each one.
After you click the New Page button...this box will appear...looks like a blog post page. Write your title, body of the page, add pictures etc and publish page just like a post.
When you are all done with your pages and you want to rearrange them in a special order...go to the DESIGN section circled in black.
There will be a Page Gadget Box...circled in black. Click the Edit button off to the right of the page gadget.
This box will appear. Allows you to show certain pages by checking them off or rearranging them in a special order by clicking and dragging them where you want them. Always click the save button when done.
Have fun with your pages!! Hope this helps. If any one has any other tips on this please share in the comments. I know I must be missing some blog tip for this.
Take care,
~Karen~


0 comments:
Post a Comment