Cari Blog Ini

Showing posts with label wreath. Show all posts

Mini Christmas Wreath Chalk Boards For Canisters

Written By Unknown on Friday, December 2, 2011 | 8:26 AM

Here is a simple and easy way to add a little Christmas touch to your kitchen...a mini chalk board wreath to add to your flour and sugar canisters. 

I added it in my kitchen, but you can add this idea for just about anything. Even add a photo for an ornament.


I've mentioned in the past that I've saved old artificial trees that had seen better days. I cut off all the branches and use them to decorate around the house. Click HERE for another wreath idea

I used the little mini branches for this idea. These branches are about 7-8 inches long. You'll also need black paper, ribbon and chalk.


Twist 2 branches to form the wreath.


Cut out circles from black card stock or construction paper. The black paper looks like a chalk board.


Add your ribbon first, then hot glue the circle to the back of the wreath.


Chalk board wreath all set for the Flour canister.


I changed my baking center around a little. Click HERE to go to that post to show how I put the center together.


Sugar, Flour, Confectioner's Sugar and Splenda...


Little touches of Christmas in the smallest of places...nothing better!

Have a great day,
~Karen~
8:26 AM | 0 comments | Read More

Tool Time Tuesday...Mini Christmas Wreath

Written By Unknown on Monday, October 17, 2011 | 9:05 PM

Happy Tuesday! I know...Christmas? It's not even Halloween yet. However, this is a quick and easy project and you're recycling too!

Today's project is this mini wreath.


Remember this candle recycling project? Click here to read all about it. That post is about using the glass tops from jar candles. Lots of great ideas!


To use the glass tops, you have to remove the plastic ring. Easy, but you are left with...


All these rings. What to do with them...make a Christmas wreath, of course!


If you don't have plastic rings, you can also use old canning jar rings.


If you've been reading Sew Many Ways for a while, you know I save a lot of crap (hence the plastic rings). Here's where I keep it all. Boxes and boxes of stuff I save...just in case.


Here's one of those boxes. I cut up an old, artificial evergreen garland that had seen better days.


Lots of little branches waiting for a project. Each branch is about 8 inches long.


Loop it through the ring...


and twist to secure. That's it!


Keep adding until the ring is full.


Add as many branches as you'd like.


You might have to trim the inside evergreen to show the shape a little more.


Add a pretty bow!


Perfect to hang any where.


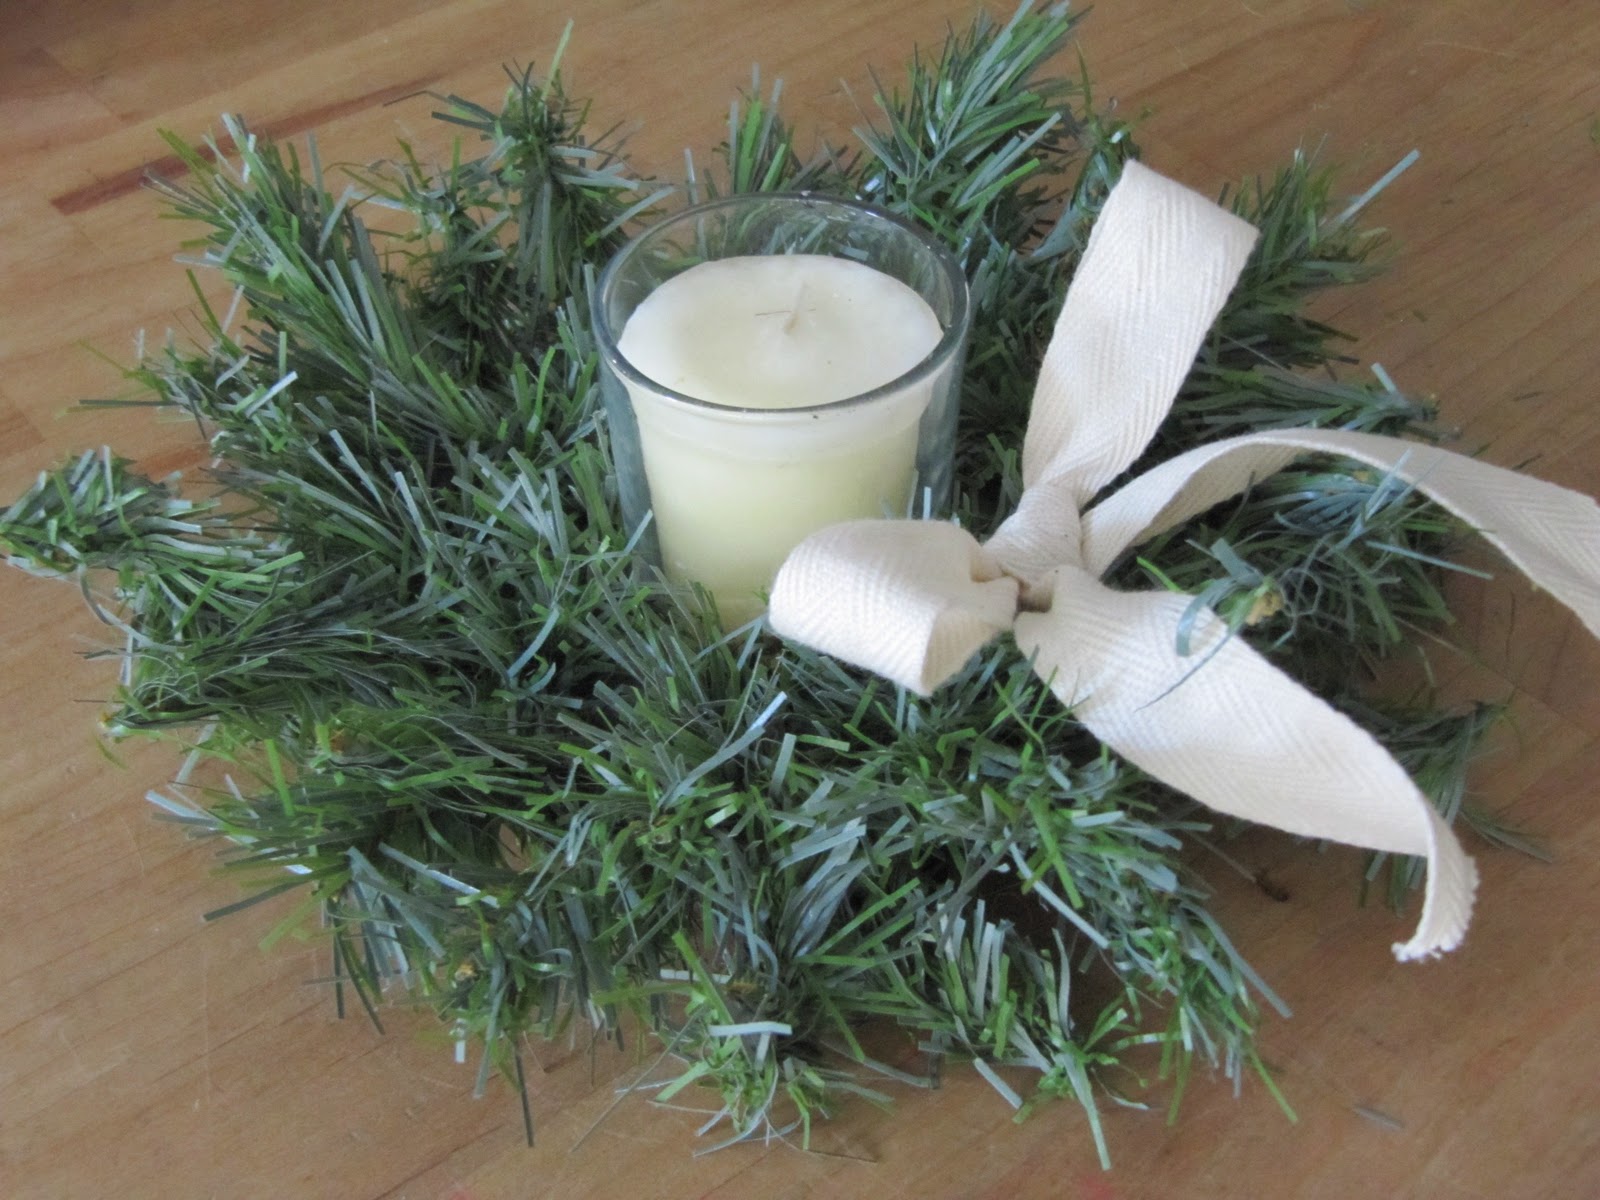
Or add a glass votive and candle to the center.


This would be so pretty with several down the center of the table.


or because they are so small...add one to each place setting.


Cute, cute!


You can also use fabric strips or ribbon and tie that onto the rings.

Have a great Tuesday and remember...always look twice at something before you through it out!
~Karen~
9:05 PM | 0 comments | Read More

Tool Time Tuesday...Snowman Wreath

Written By Unknown on Monday, November 29, 2010 | 9:01 PM

It's Tuesday...so that means Tool Time! Where are we going this week? The electrical department of the hardware store. Why?...for these little lovelies. Cable ties. I LOVE them. I use them for so many things: controlling the wire nightmare behind the computer, keeping electrical cords gathered together when storing them, holding evergreen garland to the railing and so much more. Today I'll be using these cable ties to make a snowman wreath for the front door.


The ties come in many different sizes, colors and also come in multi packs.


One side of the tie is smooth and the other has little tiny teeth. Once you insert the pointy end into the little opening in the box, the teeth will start to click. It will stay put where ever you stop the tie.


You can cinch it right up nice and tight to the item and it will not come undone until you cut it off.


Here is a quick idea for a different style wreath for your front door. Just take 3 wreaths in graduated sizes (this picture is of the backs of the wreaths). I used 2-3 ties to secure one wreath to the other.


Here is a close up. Once you have it cinched up to the tightness you'd like, you can snip the ends of the ties with wire cutters.


Quick and easy snowman wreath! Just add a scarf, hat and twigs for the arms!


I didn't have a black top hat so I took an old hat of my moms that had a rim on it, added a stretchy ski hat that I stuffed with plastic bags to keep it standing up. Added a ribbon, some berries and a little red cardinal!


I also secured the twigs to the back with the cable ties.


Too cute!


I hope you have a great Tuesday,
~Karen~
space
If you haven't joined in on the Holiday Recipe Party click here. There are so many great recipes already...hope you can add yours too.
9:01 PM | 0 comments | Read More